An orbital sander is a game-changer for achieving smooth, flawless finishes on wood, metal, and other surfaces. With its random orbit motion, it prevents unsightly swirl marks, ensuring a professional-grade result every time. Whether you’re refinishing furniture, sanding down drywall, or preparing a surface for painting, this versatile tool makes quick work of even the toughest tasks.
Compact yet powerful, orbital sanders are designed for comfort, allowing for extended use without fatigue. The ability to adjust speed settings further enhances precision, making it easier to tackle different materials and finishes.
Perfect for both beginners and experienced DIYers, an orbital sander helps save time and effort, delivering smooth surfaces that are ready for the next step in your project. A must-have for anyone serious about achieving flawless, high-quality results.
Our Top Orbital Sander Picks
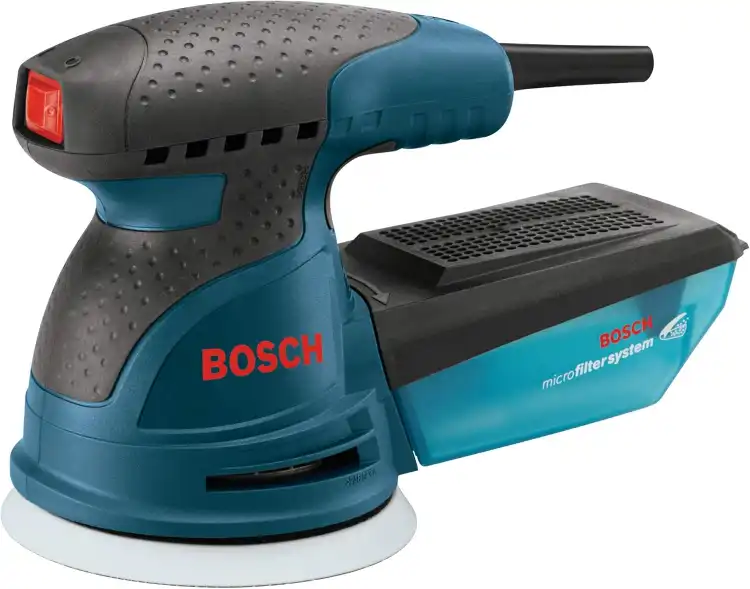
BOSCH ROS20VSC Palm Sander
Check on AmazonKey Specs
- Power: 2.5 AMP motor
- Speed: 7,500-12,000 OPM
- Dust Collection: Microfilter system for fine dust
- Attachment: Hook-and-loop disc system
- Dimensions: 9″L x 5″W x 6″H
The BOSCH ROS20VSC Palm Sander is an exceptional tool that I’ve found to be a game-changer when it comes to achieving a smooth, flawless finish. The variable speed control, coupled with its 2.5 AMP motor, lets me fine-tune my sanding process for any project. The hook-and-loop attachment system is incredibly convenient for fast, secure pad changes, and the microfilter dust collection system is fantastic for keeping my workspace clean and dust-free.
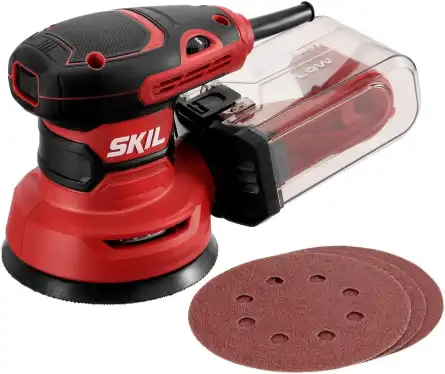
SKIL 5” Random Orbital Sander
Check on Amazon
Key Specs:
- Power: 2.8 AMP motor
- Speed: 13,000 OPM
- Dust Collection: X-flow dust collector
- Design: Ergonomic with rubber grip
- Dimensions: 7.87″L x 4.8″W x 5.51″H
The SKIL 5” Random Orbital Sander combines power and comfort for smooth sanding. Its 2.8-amp motor and 13,000 OPM ensure efficient sanding on various materials. The variable speed control lets me adjust the power to match each task, while the ergonomic design and soft rubber grip minimize vibration and fatigue. The X-flow dust collector works efficiently to trap dust, and the transparent container makes cleaning easy. Ideal for tight spaces, this sander offers excellent control and performance.

DEWALT 20V MAX Sander
Check on AmazonKey Specs:
- Power Source: 20V MAX battery
- Speed: Variable-speed from 8,000 to 12,000 OPM
- Motor: Brushless for enhanced runtime
- Dust Collection: Compatible with DEWALT dust collectors
- Design: Low-profile for precision sanding
The DEWALT 20V MAX Sander is a highly efficient, battery-powered tool designed for precision and comfort. Equipped with a brushless motor, it offers superior runtime and performance. The variable-speed control allows you to adjust between 8,000 to 12,000 OPM, making it versatile for various tasks. The sander’s low-profile height provides better control while sanding, and the dust-sealed switch ensures long-lasting durability. For added convenience, it features a replaceable hook-and-loop sanding pad and a one-handed locking dust bag.
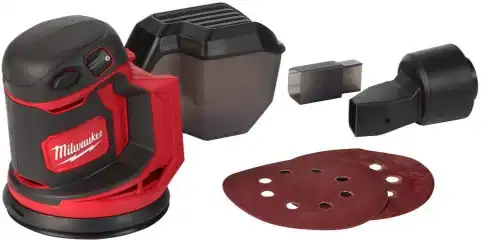
Milwaukee M18 Random Orbit Sander
Check on AmazonKey Specs:
- Power Source: 18V battery
- Design: Ergonomic and easy to use
- Function: Random orbital sanding for smooth finishes
- Dimensions: 11″L x 6″W x 7″H
- Grit Type: Fine
The Milwaukee M18 Random Orbit Sander is a durable and efficient tool designed for smooth sanding performance. Powered by an 18V battery, it ensures long-lasting operation for a range of sanding tasks. With its user-friendly design, it allows for easy maneuvering and control, making it ideal for both professionals and DIY enthusiasts. This sander meets customer expectations with its reliable power and versatile functionality.

DEWALT Random Orbit Sander
Check on Amazon
Key Specs:
- Power Source: Corded Electric
- Motor: 3-Amp, 8,000 to 12,000 OPM
- Dust Collection: Improved dust port and locking dust bag
- Dimensions: 10.25″L x 5.44″W x 6.38″H
- Grip: Rubber overmold for enhanced comfort and control
The DEWALT Random Orbit Sander is engineered for superior performance with a 3-amp motor that spins the pad at 8,000 to 12,000 OPM, ensuring efficient sanding. Its separate counterweight design minimizes vibrations for added comfort during extended use. With an improved dust-sealed switch and enhanced dust collection, it offers a cleaner, more productive workspace. The sander’s compact design allows users to get closer to the workpiece, while the rubber overmold ensures a secure grip for better control.
Mastering the Art of Orbital Sanding
Lack of Proper Safety Precautions
When it comes to using an orbital sander, safety should always be your top priority. Wearing safety goggles and a dust mask is non-negotiable. These items protect your eyes and respiratory system from flying debris and harmful dust particles generated during sanding.
Additionally, don’t forget about your attire. Opt for long sleeves, pants, and closed-toe shoes to shield your skin from potential injuries. Ear protection is also essential, as orbital sanders can produce loud noise levels that may damage your hearing over time.
| Proper Safety Precautions |
|---|
| Wear safety goggles and a dust mask |
| Choose appropriate clothing |
| Use ear protection |
Incorrect Sandpaper Grit Selection
Understanding sandpaper grits is essential for achieving the desired finish. Grit refers to the coarseness of the sandpaper – the lower the number, the coarser the grit. For heavy material removal, opt for lower grits like 60 or 80. Finer grits such as 120 or 220 are ideal for smoothing surfaces.
Choosing the right grit for the job is crucial. Using a grit that is too coarse can leave deep scratches, while a grit that is too fine may not effectively remove imperfections. The wrong grit can compromise the quality of your project and result in additional work to correct the errors.
- Coarse grits (60-80) for material removal
- Finer grits (120-220) for smoothing
- Impact of incorrect grit selection on project quality
Applying Too Much Pressure
An orbital sander operates by rotating the sanding pad in a circular motion while simultaneously moving it in an elliptical pattern. The tool is designed to do the work for you, so avoid applying excessive pressure. Let the sander glide over the surface smoothly, allowing the sandpaper to do its job effectively.
The proper technique involves guiding the sander gently across the surface, letting the tool’s weight and motion create the desired finish. Applying too much pressure can lead to uneven sanding, gouges in the material, and premature wear on the sandpaper.
- Understanding how an orbital sander works
- Proper technique for using the sander
- Consequences of applying excessive pressure
Neglecting to Sand in Stages
For a flawless finish, sanding in stages is key. Start with a coarser grit to remove imperfections and level the surface. Progress to finer grits gradually to refine the smoothness of the material. Each stage builds upon the previous one, leading to a polished and professional result.
By neglecting to sand in stages, you risk missing imperfections that could have been addressed earlier. Skipping grits can also result in a rough finish or uneven surfaces, detracting from the overall quality of your project.
- Start with a coarser grit
- Progress to finer grits
- Achieve a smooth finish through staged sanding
Not Cleaning the Surface Properly Before Sanding
Before diving into sanding, ensure that the surface is clean and free of debris. Dust and particles left on the material can damage the sandpaper and hinder the sanding process. Use a tack cloth or a vacuum cleaner to remove any contaminants and create a smooth working surface.
Sanding a dirty surface can lead to scratches, clogged sandpaper, and an uneven finish. Taking the time to clean the material beforehand will not only improve the sanding results but also prolong the life of your sandpaper.
| Proper Surface Cleaning |
|---|
| Remove dust and debris |
| Use a tack cloth or vacuum cleaner |
| Impact of sanding a dirty surface |
Conclusion
In conclusion, mastering the art of orbital sanding requires attention to detail and adherence to safety guidelines. By avoiding common mistakes such as neglecting safety precautions, selecting the wrong sandpaper grit, applying too much pressure, skipping sanding stages, and failing to clean the surface properly, you can achieve professional results and protect both yourself and your workpiece.
Remember, safety should always come first when using power tools like an orbital sander. Following best practices and techniques will not only enhance the quality of your projects but also ensure a safe and enjoyable sanding experience.
FAQ
Can I use an orbital sander without wearing safety goggles?
It is highly recommended to always wear safety goggles when using an orbital sander to protect your eyes from flying debris.
How often should I change the sandpaper grit when sanding?
It is advisable to change the sandpaper grit as you progress through different stages of sanding, starting with a coarser grit and moving to finer grits for a smooth finish.
Is it necessary to clean the surface before sanding?
Yes, cleaning the surface before sanding is crucial to ensure optimal results and prevent damage to the sandpaper.