Importance of Maintaining and Replacing Your Belt Sander Belt
Understanding Belt Sanders
When it comes to DIY projects or professional woodworking, a belt sander is a handy tool to have in your arsenal. This power tool is designed to quickly and efficiently sand down wood, metal, or other materials, saving you time and effort. The belt sander works by using a continuous loop of sandpaper that rotates around two drums to smooth out rough surfaces and remove imperfections.
There are various types of belt sanders available in the market, ranging from handheld compact models to large stationary sanders used in industrial settings. Each type caters to different needs and preferences, offering varying levels of power and precision. However, regardless of the type, the key component that ensures the proper functioning of a belt sander is the belt itself.
Having a properly functioning belt sander belt is crucial for achieving smooth and consistent sanding results. The belt is responsible for the actual sanding action, and if it is worn out or damaged, it can lead to subpar performance and potentially damage the material you are working on. Regular maintenance and timely replacement of the belt are essential to keep your belt sander in top condition.
Our Top Belt Sander Belt Picks

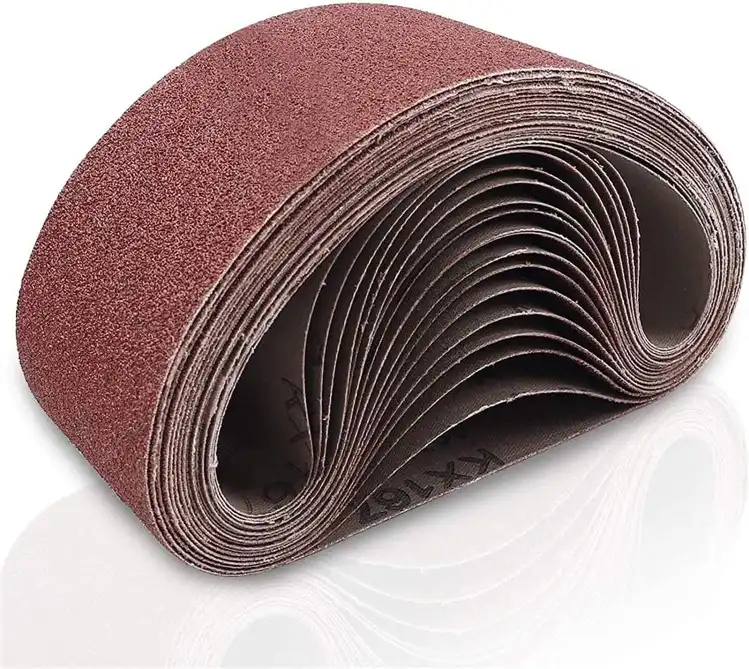
POWERTEC 3 x 21 Inch Sanding Belts, 80 Grit Aluminum Oxide Belt Sander Sanding Belt
Check on AmazonKey Specs:
- Size: 3″ x 21″
- Grit: 80
- Material: Aluminum Oxide
- Backing: X-weight cloth
- Package Quantity: 10 pieces
The POWERTEC 3 x 21 Inch Sanding Belts are exceptionally durable and versatile for a variety of sanding applications. Made from premium open-coat aluminum oxide, they are perfect for wood sanding, metal polishing, and fiberglass or plastic finishing. The X-weight cloth backing provides strong support, while the resin on resin bond ensures long-lasting performance even under pressure. The 80 grit is perfect for removing imperfections, and the strong butt joint construction guarantees no seams will break during use. These belts are a fantastic choice for both professionals and DIY enthusiasts.
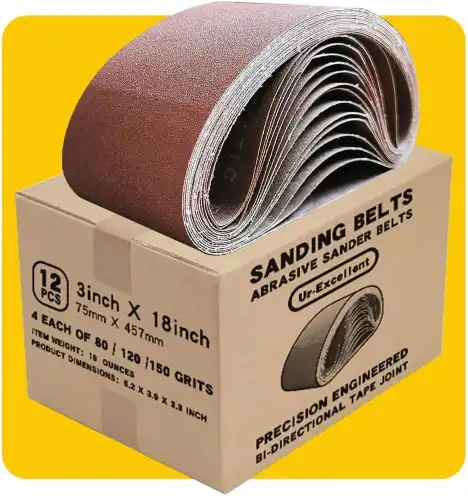
Coceca 3×18 Inch Sanding Belts, 21 Packs Belt Sander Paper Aluminum Oxide Sandpaper
Check on AmazonKey Specs:
- Size: 3″ x 18″
- Material: Aluminum Oxide
- Grits: 40, 60, 80, 120, 180, 240, 320 (3 each)
- Quantity: 21 pieces
- Applications: Wood, metal, plastic, glass, stone
The Coceca 3×18 Inch Sanding Belts are an excellent choice for woodworking and metalworking enthusiasts. This 21-pack assortment includes a variety of grits (40, 60, 80, 120, 180, 240, and 320), offering flexibility for different sanding tasks. Made from open-coat aluminum oxide, these belts are heat and moisture-resistant, ensuring long-lasting performance. The well-treated seams prevent breakage, and the easy installation process makes replacements a breeze. These sanding belts work well on a variety of materials, including wood, metal, plastic, and glass.
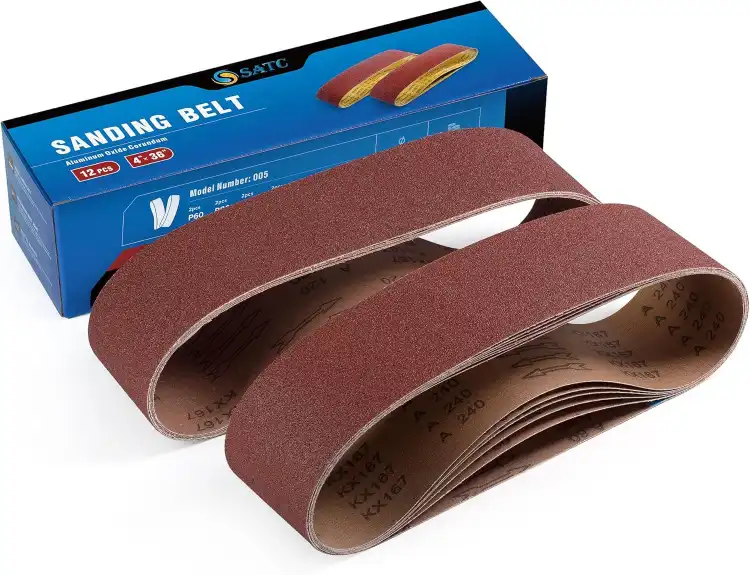
S SATC 12PCS Sanding Belts 4×36-Inch Sanding Belt Belt Sander Belt Sander Paper
Check on AmazonKey Specs:
- Size: 4″ x 36″
- Grits: 60, 80, 120, 150, 240, 400 (2 each)
- Material: Aluminum Oxide
- Quantity: 12 belts
- Applications: Wood, metal, fiberglass, plastic, rubber, non-ferrous metals
The S SATC 12PCS Sanding Belts are an excellent choice for both professionals and DIYers. Made with premium open-coat aluminum oxide grain, they offer superior abrasion resistance and are designed to prevent clogging and static buildup. The diagonal lap splice at the seam ensures a strong connection, reducing the risk of the belt coming apart during use. With a variety of grits from 60 to 400, these belts are perfect for everything from heavy sanding and stripping to delivering a smooth finish on various materials like wood, metal, and plastics.
POTUINOM 3 x 21 Inch Sanding Belts 80 Grits – 10 Pack Sander Belts
Check on AmazonKey Specs:
- Size: 3″ x 21″
- Grit: 80 (Coarse)
- Material: Aluminum Oxide
- Quantity: 10 Belts
- Applications: Wood, metal, fiberglass, plastic, rubber, non-ferrous metals
The POTUINOM 3 x 21 Inch Sanding Belts (80 Grits – 10 Pack) are ideal for achieving fast, efficient grinding on a variety of surfaces. These belts feature high-quality aluminum oxide particles, offering superior abrasion resistance, and have an X-Weight clothed backing for added durability. The firm seams are designed to withstand pressure without breaking, ensuring smooth performance during heavy-duty sanding. Perfect for wood, metal, and paint, these belts will save you time and effort while delivering top-notch results.
TPmax 3×18 3 x 18 Inch Sanding Belt
Check on AmazonKey Specs:
- Size: 3″ x 18″
- Material: Aluminum Oxide
- Grits Included: 80, 120, 150 (4 each)
- Antistatic & Washable
- Applications: Wood, aluminum, plastic, glass, stone
The TPmax 3×18 Inch Sanding Belt Pack is a solid choice for various sanding tasks. The premium aluminum oxide grain ensures effective abrasion resistance and durability, while the diagonal lap splice technology guarantees that the belts won’t easily break. These belts are ideal for sanding a wide range of materials, including wood, aluminum, and plastic, and feature antistatic and washable properties that resist loading. The assortment of 12 belts offers versatility with 80, 120, and 150 grit options.
Types of Belt Sanders:
| Type | Description |
|---|---|
| Handheld Belt Sander | Portable and versatile, suitable for small to medium-sized projects. |
| Stationary Belt Sander | Larger and more powerful, ideal for heavy-duty sanding tasks and professional use. |
| Compact Belt Sander | Lightweight and easy to maneuver, perfect for detail work and tight spaces. |
Signs of a Worn-Out Belt Sander Belt
As with any tool, a belt sander belt will show signs of wear and tear over time, indicating that it needs to be replaced. Recognizing these signs early on can help prevent any issues during your sanding projects and ensure the longevity of your belt sander.
One of the most common signs of a worn-out belt sander belt is a noticeable decrease in sanding performance. If you find that the sander is taking longer to smooth out surfaces or is leaving behind uneven finishes, it may be time to check the condition of the belt. Additionally, visible wear and tear on the belt itself, such as fraying edges or smooth spots, are clear indicators that a replacement is needed.
Unusual noises during operation, such as grinding or squeaking sounds, can also signal that the belt is worn out and struggling to perform effectively. Ignoring these signs and continuing to use a damaged belt can not only compromise the quality of your work but also pose safety risks. It is best to address any issues promptly by replacing the belt.
Signs of a Worn-Out Belt Sander Belt:
– Decreased sanding performance
– Visible wear and tear on the belt
– Unusual noises during operation
Tools and Materials Needed for Belt Sander Belt Replacement
Tools and Materials Needed for Belt Sander Belt Replacement
Before replacing your belt sander belt, gather all the necessary tools and materials to ensure a smooth and efficient process. Having everything on hand will save time and frustration.
Required Tools and Materials:
Replacement belt – Ensure you have the correct size and type for your specific belt sander model.
Screwdriver – Used to loosen and adjust the belt tension.
Owner’s manual – Provides specific instructions for your sander model.
Safety goggles and gloves – Protect your eyes and hands from debris and sharp edges.
By preparing these items in advance, you can proceed confidently and complete the belt replacement efficiently.
Tools and Materials Needed:
| Tool/Material | Description |
|---|---|
| Replacement Belt | Correct size and type for your belt sander. |
| Screwdriver | For loosening and adjusting belt tension. |
| Owner’s Manual | Provides specific instructions for your sander model. |
| Safety Goggles/Gloves | Protects from debris and sharp edges. |
Safety Precautions
When working with power tools like a belt sander, safety should always be a top priority. Before attempting to maintain or replace your belt sander belt, it’s crucial to take the necessary precautions to prevent accidents and injuries.
Start by disconnecting the power source to the sander to avoid any accidental starts while working on it. Wear appropriate safety gear, including safety goggles to protect your eyes from dust and debris, and gloves to shield your hands from sharp edges. Additionally, ensure you are working in a well-ventilated area to prevent the buildup of dust and fumes that may be generated during the maintenance process.
By following these safety precautions, you can create a safe working environment and minimize the risks associated with belt sander maintenance and replacement.
Safety Precautions:
– Disconnecting the power source
– Wearing appropriate safety gear
– Working in a well-ventilated area
Removing the Old Belt
When it’s time to replace your belt sander belt, the first step is to remove the old, worn-out belt from the sander. This process involves loosening the tension on the existing belt, sliding it off the sander’s drums, and inspecting the sander for any potential damage that may have occurred.
Start by locating the tension adjustment knob or lever on your belt sander and loosening it to release the tension on the belt. Once the tension is relieved, carefully slide the old belt off the sander’s drums, taking note of how it is positioned for when you install the new belt. While the old belt is off, inspect the sander’s drums and other components for any signs of wear or damage that may need attention.
By properly removing the old belt and assessing the condition of the sander, you can prepare the machine for the installation of a new belt and ensure optimal performance.
Steps to Remove the Old Belt:
1. Loosen the tension on the belt.
2. Slide the old belt off the sander.
3. Inspect the sander for any damage.
Installing the New Belt
Once you have removed the old belt and inspected the sander, it’s time to install the new belt for continued smooth operation. Choosing the right replacement belt is crucial, as using the correct size and type will ensure proper sanding performance and longevity of the belt sander.
Begin by selecting a replacement belt that matches the specifications of your belt sander model. Align the new belt on the sander’s drums, making sure it sits evenly and securely in place. Adjust the tension of the new belt using the tension adjustment knob or lever until it is taut and properly positioned for operation.
Proper installation of the new belt is essential for achieving optimal sanding results and maintaining the efficiency of your belt sander. Take your time to ensure the belt is correctly aligned and tensioned before testing the sander.
Steps to Install the New Belt:
1. Choose the right replacement belt.
2. Align the new belt on the sander.
3. Adjust the tension of the new belt.
Testing the Belt Sander
After installing the new belt on your belt sander, it’s crucial to test the machine to ensure everything is functioning correctly before resuming your sanding projects. Testing the sander without any material allows you to check for proper alignment and tension of the new belt, ensuring smooth and consistent operation.
Reconnect the power source to the belt sander and turn it on without placing any material on the sanding surface. Listen for any unusual noises and observe the movement of the belt to confirm that it is running smoothly and without any issues. Check the alignment of the belt on the drums and make any necessary adjustments to the tension if needed.
By conducting a thorough test of the belt sander, you can verify that the new belt is installed correctly and ready for use in your woodworking or DIY projects.
Steps to Test the Belt Sander:
1. Reconnect the power source.
2. Run the sander without any material.
3. Check for proper alignment and tension.
Proper Maintenance Practices
To ensure the longevity and optimal performance of your belt sander and its belt, it’s essential to follow proper maintenance practices regularly. By incorporating these practices into your routine, you can extend the lifespan of your sander and avoid premature wear and tear on the belt.
Regularly cleaning the belt sander, especially the sanding surface and dust collection system, helps prevent dust buildup that can affect the sander’s performance. Additionally, checking the belt tension periodically and adjusting it as needed ensures consistent sanding results and prevents unnecessary strain on the motor and other components.
Lubricating moving parts of the belt sander, as recommended by the manufacturer, helps reduce friction and wear, prolonging the life of the machine. By staying proactive with maintenance tasks, you can enjoy smooth and efficient sanding operations for years to come.
Proper Maintenance Practices:
– Regularly cleaning the belt sander
– Checking the belt tension periodically
– Lubricating moving parts as recommended
Troubleshooting Common Issues
Despite proper maintenance, belt sanders may encounter common issues that can affect their performance. Understanding how to troubleshoot these problems can help you address them promptly and prevent further damage to your sander and its belt.
One common issue is the belt slipping off during operation, which can be caused by improper alignment or tension. If you notice uneven sanding results, it may indicate a problem with the belt or the sander’s drums that require adjustment or replacement. Excessive heat generated during sanding can also be a sign of a worn-out belt or a motor issue that needs attention.
By identifying and addressing these common issues early on, you can maintain the efficiency of your belt sander and prevent costly repairs down the line.
Troubleshooting Common Issues:
– Belt slipping off during operation
– Uneven sanding results
– Excessive heat generated during sanding
Extending the Lifespan of the Belt Sander Belt
To maximize the lifespan of your belt sander belt and ensure consistent sanding results, it’s essential to adopt practices that promote longevity and efficiency. By following these tips, you can prolong the life of your belt sander belt and enjoy smooth sanding operations for years to come.
Using the correct grit sandpaper for different materials helps prevent premature wear on the belt and ensures optimal sanding performance. Avoid applying excessive pressure while sanding, as this can strain the motor and cause unnecessary wear on the belt. When not in use, store the belt sander in a dry and dust-free environment to protect it from damage and maintain its functionality.
By incorporating these practices into your woodworking routine, you can extend the lifespan of your belt sander belt and enjoy consistent results with every sanding project.
Tips to Extend the Lifespan:
– Using the correct grit for different materials
– Avoiding excessive pressure while sanding
– Storing the belt sander properly when not in use
Benefits of Properly Maintained Belt Sander Belts
Maintaining and replacing your belt sander belt regularly offers a range of benefits that contribute to the efficiency and longevity of your woodworking tools. By following proper maintenance procedures and replacing worn-out belts in a timely manner, you can enjoy consistent sanding results and extend the lifespan of your belt sander.
One of the key benefits of properly maintained belt sander belts is the assurance of consistent sanding results across various projects. A well-maintained belt ensures smooth and even sanding, allowing you to achieve professional-quality finishes on your woodworking pieces. Additionally, by taking care of your belt sander and its components, you can prolong the overall lifespan of the machine and avoid costly repairs or replacements.
Moreover, by investing time and effort in maintaining your belt sander belt, you can save money in the long run by avoiding frequent replacements and repairs. Regular maintenance and timely belt replacements help prevent premature wear and damage to the sander, ultimately reducing maintenance costs and ensuring uninterrupted workflow in your woodworking projects.
Benefits of Properly Maintained Belts:
– Consistent sanding results
– Longer lifespan of the belt sander
– Cost savings by avoiding frequent replacements
Conclusion
In conclusion, maintaining and replacing your belt sander belt is essential for ensuring the optimal performance and longevity of your woodworking tools. By following the proper procedures outlined in this guide, you can keep your belt sander in top condition and enjoy smooth and efficient sanding operations for years to come.
Remember to regularly inspect your belt sander belt for signs of wear and tear, and promptly replace it when necessary to prevent any issues during your projects. By incorporating proper maintenance practices and troubleshooting common issues, you can extend the lifespan of your belt sander and achieve professional-quality results in your woodworking endeavors.
Whether you are a DIY enthusiast or a professional woodworker, taking care of your belt sander and its belt will pay off in the long run, saving you time, money, and frustration in the workshop.
FAQ
How often should I replace my belt sander belt?
It is recommended to replace your belt sander belt whenever you notice a decrease in sanding performance, visible wear and tear on the belt, or unusual noises during operation. Regularly inspecting the belt for these signs and replacing it promptly can help maintain the efficiency of your belt sander.
Can I use any replacement belt for my belt sander?
It is essential to use the correct size and type of replacement belt for your specific belt sander model. Using an incompatible belt can lead to poor sanding results, damage to the sander, and safety hazards. Refer to your owner’s manual or consult with a professional to ensure you choose the right replacement belt.
How can I prevent my belt sander belt from slipping off during operation?
To prevent your belt sander belt from slipping off during operation, ensure that the belt is aligned properly on the sander’s drums and that the tension is adjusted correctly. Improper alignment or tension can cause the belt to slip off, leading to uneven sanding results and potential damage to the sander. Regularly check and adjust the belt tension as needed to prevent slipping.